How to File 1099’s in QuickBooks
1099’s for the prior year are due to your Contract Labor vendors by Jan 31st. Even if you did not set up your 1099 tracking correctly in QuickBooks at the beginning of the year, you can capture the information by setting it up now.
As with any year-end report processing, I always recommend reconciling all of your checking accounts prior to preparing your reports. As with W-2’s, the data you provide to your 1099 vendors will have personal income tax consequences for them, and it’s important the information you report to them and to the government is accurate.
The first step in 1099 processing is to be sure you know who to send 1099’s to and have the system set up correctly in QuickBooks. The general rules are that for every unincorporated vendor you contract for labor or labor and material services combined, you must have them complete a form W-9, which provides you with their Tax ID#*.
In order to generate a 1099 report for this vendor at the end of the year, you must set up the vendor properly in QuickBooks by clicking on the “Additional Information” tab in the vendor record, checking the “Vendor eligible for 1099”, and enter the vendor’s tax id#. This part of 1099 processing is pretty intuitive, as you are likely to notice these options during vendor set up.
However, this is not all you need to do in order to generate the 1099’s in QuickBooks. In older versions of QuickBooks – you a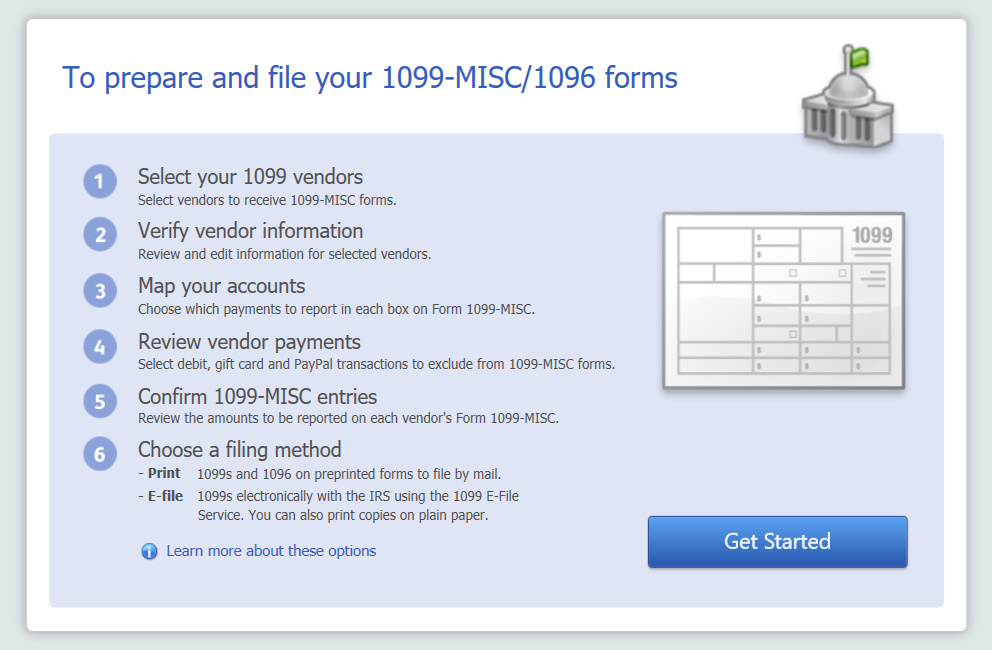 lso need to go into the “Edit” “Preferences” menu. Near the bottom of the list you will see the option “Tax:1099”, click on this option and the tab “Company preferences”. In newer versions in QuickBooks, I recommend accessing the 1099 Wizard, which you can access from the Vendors menu – Print/Efile 1099s.
If you are not sure about what to do here, by all means, consult the IRS web site at www.irs.gov or your tax professional.
For most contractors, we are focusing on contracted labor services, which should be reported in box 7 for “non-employee compensation” , which has a default threshold of $600*.
The 1099 Wizard will take you through a process of reviewing your vendors, in older versions, you can run a 1099 vendors report.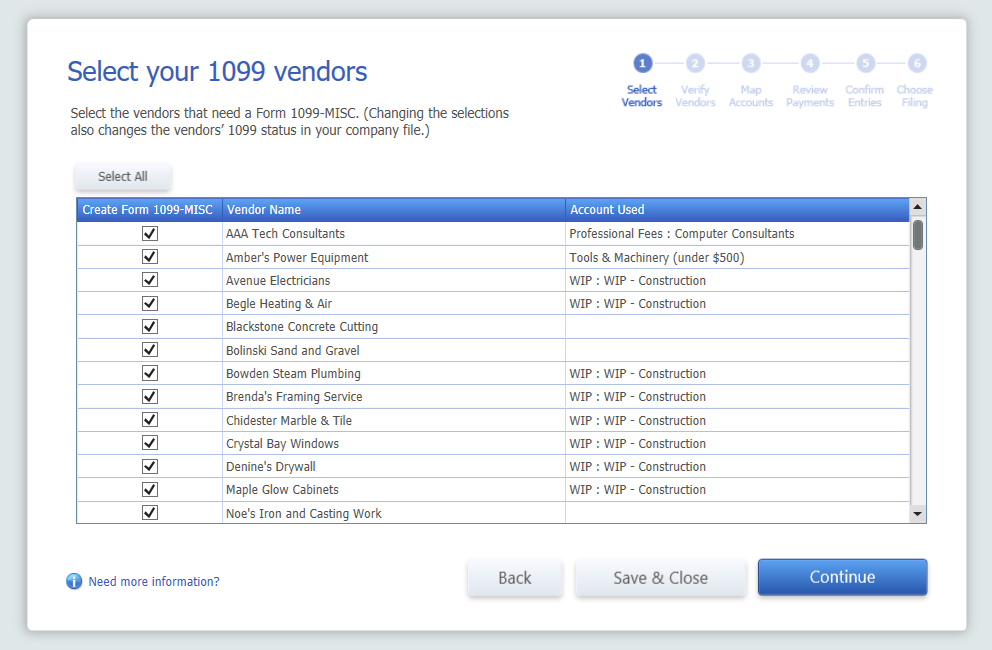
In the second step you will “map your accounts”. Here we need to tell QuickBooks which accounts to apply 1099 reporting to. This step is required in order to generate 1099’s in QuickBooks. The reason QuickBooks needs to know this is that not all payments you make to your 1099 vendors may be reportable on the 1099 as non-employee compensation. For instance, if you happen to reimburse them for materials or mileage, these payments may not be included on the 1099*. In this space, I usually select the “multiple accounts” option and choose any accounts that I may pay a 1099 vendor that may qualify as non-employee compensation. You must consider how your items are set up as well and be sure accounts that are linked to items that may include employee compensation are included here. For instance, you may choose your Cost of Goods Sold Account called “Sub- Contractor Costs”, but you may sometimes pay your subcontractors with an item linked to a generic Cost of Goods Sold Account, in this case you may need to include this account as well. Keep in mind, though, that material purchases only are generally not included in 1099, only labor or labor and materials contracted in combination*.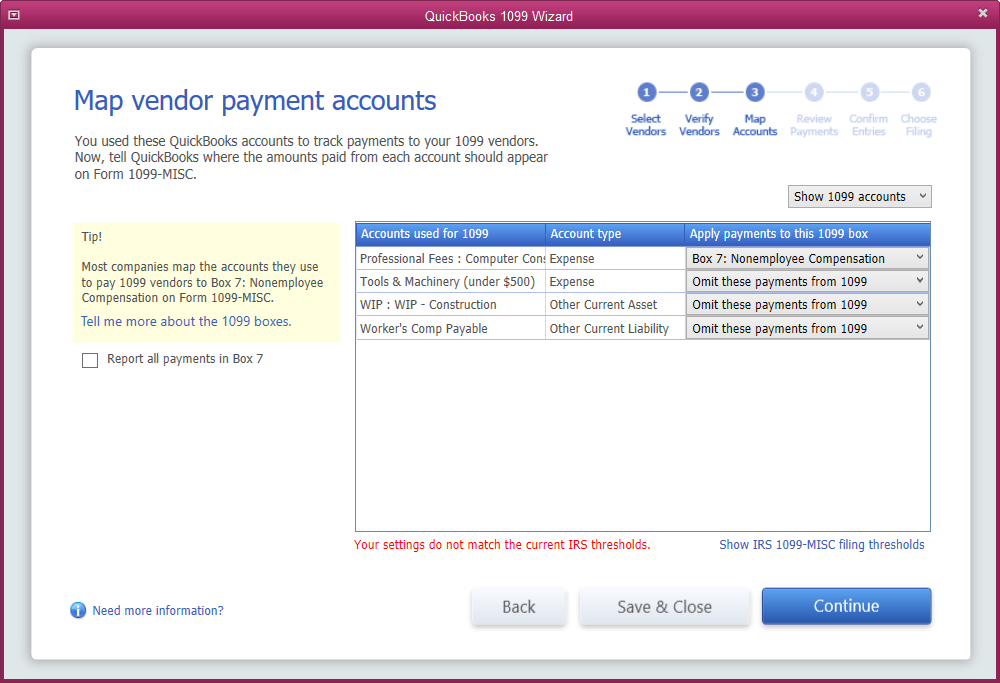
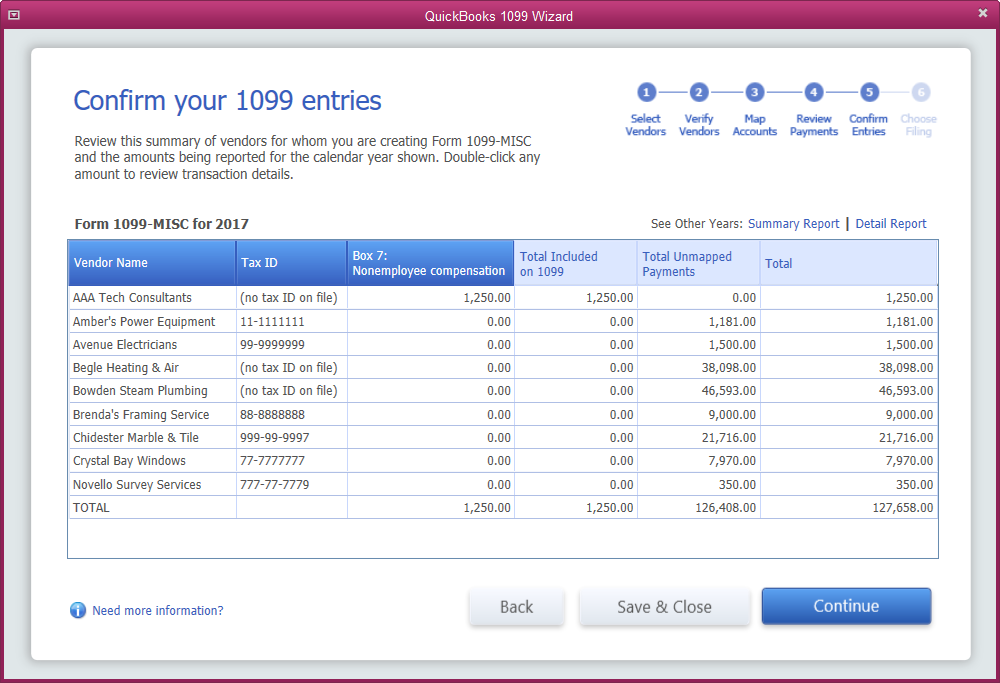
In older versions – the next step is to run a 1099 detail and 1099 summary report from the “Reports” “Vendors and Payables” menu and review the transactions that are included carefully. I also run a “Transaction List by Vendor” report for the entire year to be sure I have not missed any vendors who should receive a 1099. In newer versions, the Wizard will give you the option to review the included and excluded 1099 vendor payment reports.
In older versions go to the “Vendor” menu and “Print 1099’s and1096’s”. If you are in the wizard, the next step will be to choose your filing method. I definitely recommend filing electronically, but you can also purchase the forms from Staples or Intuit and print them out. If filing electronically, I recommend that you first send out your 1099’s to your vendors and wait a few weeks before the final government filing with SSA. It’s amazing how often your subcontractors will call with all kinds of issues – Tax id changes, “this is the wrong amount”, etc. It’s easier to change if you haven’t filed them yet with the SSA and don’t have to send in a revision to them. Just make sure to put a reminder on your calendar and not miss the deadline (usually mid-Feb).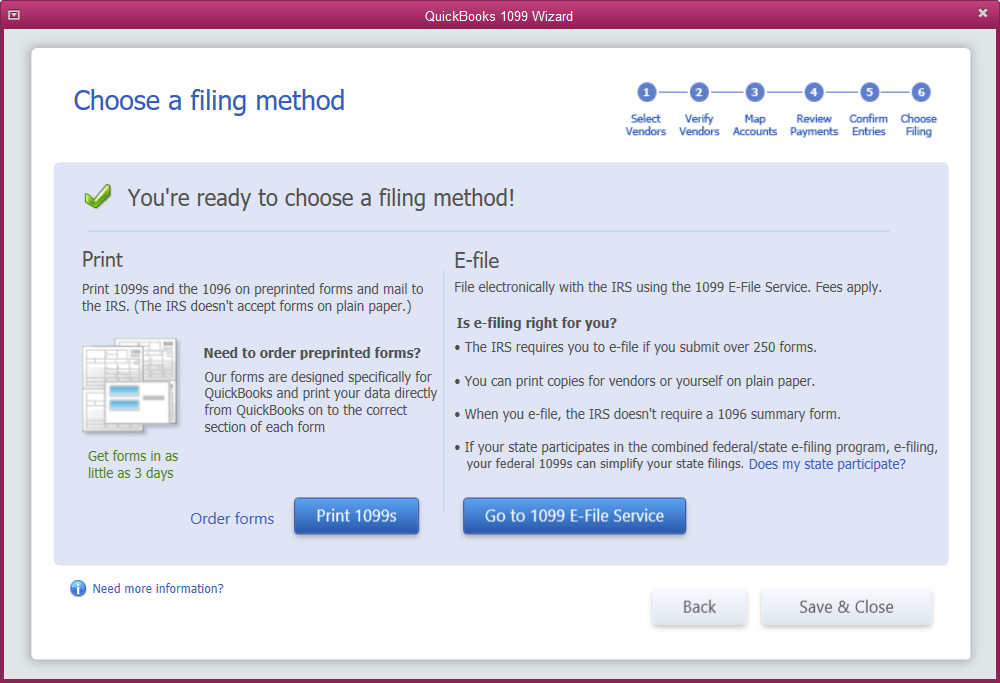
*NOTE: I am not a tax professional and do not profess to advise 1099 or tax reporting requirements. These instructions are intended to generalize the reporting IRS reporting requirements in order to provide technical
information on how to set up QuickBooks properly for reporting. Please consult your tax
professional or the IRS for complete 1099 reporting requirements.